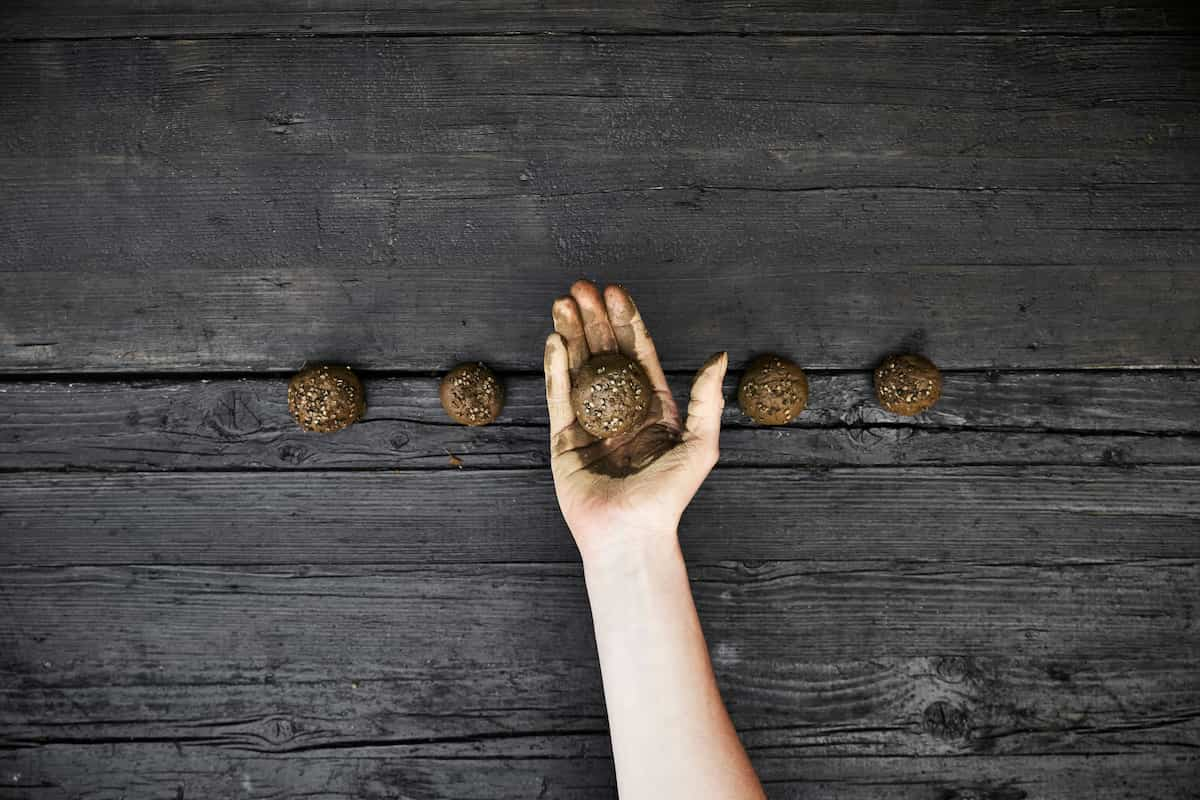
A seed ball is also known as a seed bomb, and it is a seed that has been wrapped in soil materials, a mixture of clay and compost, and then dried. Seed balls are a great way to start your plants in the springtime. Seed balls are a method of growing plants from seeds without preparing the ground with plows or other farming equipment.

How Do You Make Seed Balls
How Effective Are Seed Balls?
Seed balls are a fun and easy way to help in gardening. They are a great way to teach them about plant life and how seeds grow. There are many advantages to making seed balls at home, including the fact that you can customize your balls’ size, shape, and texture. Seed balls have an 80 percent growth success rate compared to regular seedlings, which helps people farming in rural areas have a more consistent food supply. Mix equal proportions of red clay soil, black soil, and compost.
Advantages of Seed Balls
- One advantage of seed balls is that they’re easy to make. It would help if you had some simple supplies and could get started immediately. They’re also portable, so you can take them wherever you go.
- Another advantage of seed balls is that they’re versatile. You can use them to start plants indoors or outdoors, in pots, or on the ground. And because they’re small, they don’t require much-growing space.
- They are easy to care for. Seed balls require less attention than regular soil because they don’t contain any roots or stems. Water them and leave them alone.
- They provide better drainage than regular potting mixes. Because seed balls have no solid structure, water can easily flow through them and reach the roots of plants. This helps prevent root problems and dry plants.
- Seed balls absorb moisture better than regular soil. This allows plants to grow more vigorously and resist drying out during hot weather conditions or during times of low rainfall.
In case you missed it: How to Create and Care for an Herb Garden: DIY in Simple Steps

Uses of Seed Balls
The elements found in the balls continue to service the surrounding region, improving it more than before, until the seed bursts out of the ball, providing a thriving environment for the seed. To develop wildflowers, seed balls can also be utilized. These blooms are essential for bee pollination. The ability of seed balls makes it possible to re-establish species of trees that have been entirely or partially removed from their native habitats. You only need to prepare the seeds of certain species into seed balls before releasing these into the surroundings.
Disadvantages of Seed Balls
- Seed balls don’t last as long as direct planting would. They will die if kept in water or soil for more than a few days.
- Seed balls require maintenance – you’ll have to water them regularly and add fresh soil if necessary.
- Seed balls can be expensive to purchase compared to traditional potting mixes because they often contain more ingredients than what is found in most stores’ garden sections
- Seed balls aren’t very effective at repelling pests or helping plants grow strong roots.
What You’ll Need to Make Seed Balls
Equipment / Tools
- 1 Mixing bowl
- 1 Measuring cup
- 1 Spoon
- 1 Drying rack
Materials
- Fresh clay soil or dried clay
- Compost
- Water
- Seeds
- Plant labels
Step-By-Step Guide Recipe to Make Seed Balls
- Create Clay Mixture – If you don’t have soil, start with dried clay from a local ceramic supplier or online source. Mix two parts of dried clay with one part of the compost. Add water to make it a soft and malleable consistency, similar to cookie dough.
- Mix clay Thoroughly – Mix the clay with your hands until it is consistent for rolling. If the clay is too runny, add dried clay. If the clay is too stiff, and then add water.
- Roll Clay Balls – Roll the soft clay between palms to form walnut-sized balls (about 1 inch in diameter) and place the finished balls on a tray.
- Press In Seeds – Press 20 to 30 seeds into each clay ball and reshape the ball, working the different seeds into the clay. Set the seed balls on a rack to dry warmly for several days. Store away from heat and moisture.
- Plant Seed Balls – Once seed balls are dry, plant them in the desired location. Due to the nature of seed balls, you will end up with clusters of plants when they germinate. Then, add plant markers to seed ball locations if desired.
In case you missed it: How to Protect Your Garden from Frost: Preparation for Vegetables, Fruits, Flowers, and Herbs

How Do You Make a Seed Ball at Home?
- Seed balls are a fun way to get your daily fruits and vegetables. They’re easy to make and can be customized to your preferences. Here’s how to make them:
- Start by mixing the ingredients in a bowl. Add as much variety as possible, including seeds, nuts, dried fruit, and spices. The more diverse the ingredients, the better!
- Use your hands to mix everything until it forms a sticky ball. If it’s too wet or sticky, add some flour or oats until it reaches the desired consistency.
- Place the mixture on a baking sheet and sit for an hour. This will help the seeds to sink and form a ball.
- Once it’s hardened, use a sharp knife to cut it into small pieces (or use your hands if you want). Serve immediately or store in an airtight pot or container for later use.
What Seeds Are Best for Seed Balls?
Some seeds for seed balls include Wildflowers (Native to Your Area), Alyssum, Lobelia, Butterfly Milkweed, Basil, Cilantro, Lettuce, Scarlet Sage, Sunflower, or Tomatoes, all of which grow easily from seed. Wheat, sunflower, and pumpkin seeds are all popular choices.
Tips to Make Seed Balls
- Soak the seeds in water overnight.
- Place the soaked seeds in a food processor or blender and blend until they’re a rough paste.
- Transfer the mixture to a large bowl and add enough filtered water to make a thick ball-like consistency (you may not need all of the water).
- Use your hands to shape the mixture into small balls and place them on moistened soil in a container or pot.
- Cover the container with plastic wrap and leave it at room temperature for about 12 hours, or place it in a cold draft-free area overnight.
Conclusion
Seed balls are small spheres of soil, seeds, and fertilizer used to plant vegetables and flowers. Seed balls are the perfect option if you want a fun and easy way to add nutrients to your plant’s soil. Seed balls are a type of potting mix that is used to replace the soil in plant containers. They combine organic matter such as sawdust, perlite, or vermiculite with seeds and water. The mixture is then balled up and placed in a container.
- Ultimate Guide to Ossabaw Island Hog: Breeding, Raising, Diet, and Care
- Ultimate Guide to Juliana Pig: Raising Facts, Size, Diet, Care, and Lifespan
- Raising Lleyn Sheep: Disadvantages, Price, Uses, Characteristics, and Care
- Ultimate Guide to Meishan Pig: Breed Facts, Breeding, Raising, and Care
- Ultimate Guide to Teacup Pigs: Raising, Diet, Lifespan, Cost, and Care
- Guide to Raising Poll Dorset Sheep: Facts, Profile, Characteristics, Uses, and Care
- Ultimate Guide to Bighorn Sheep: Characteristics, Diet, Lifespan, Breeding, and Lifecycle
- Ultimate Guide to Raising Katahdin Sheep: Farming Facts, Breed Profile, Uses, and Care
- Ultimate Guide to Raising Oreo Cows: Belted Galloways Farming Facts, Profile, Uses, and Care