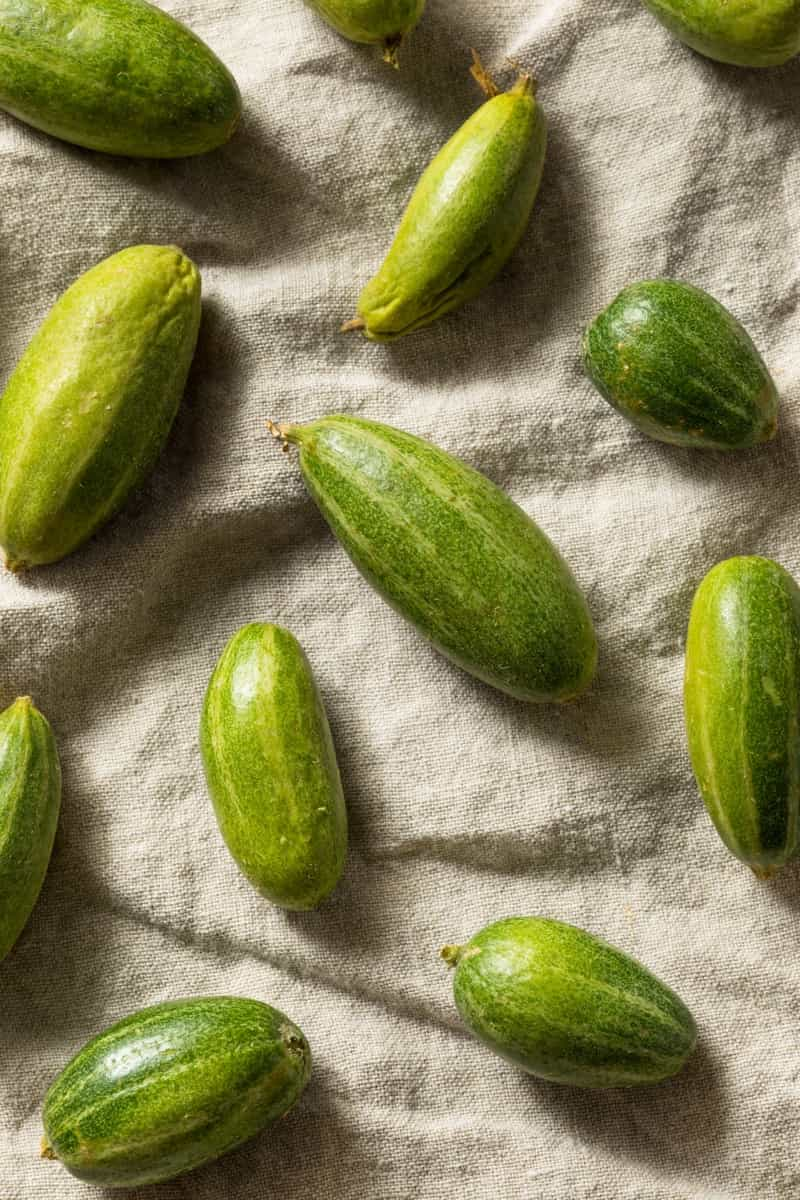
Pointed gourd, or Parwal, is a popular vegetable widely cultivated in many regions. It is known for its delicious taste and is used in various culinary dishes. Growing Pointed gourd from seed at home can be a rewarding experience and allows you to enjoy fresh and organic produce. This article will guide you through parwal seed germination, planting, care, yield, and harvest.

Growing Pointed Gourd from Seed
Understanding Pointed Gourd and Its Growing Requirements
Pointed gourd plants require a warm and humid climate to thrive. They grow well in well-drained soil with a pH range of 6.0 to 7.5. Adequate sunlight is necessary to grow Pointed gourd plants, so they should be planted in an area that receives at least 6 hours of sunlight daily. Regular watering is necessary to maintain soil moisture, especially during fruiting. Providing support for the vine to climb on is also important. Seated gourd plants can yield a bountiful harvest with proper care and attention to their growing requirements.
Selecting and Preparing Pointed Gourd Seeds for Germination
Selecting and preparing Pointed gourd seeds for germination is crucial for a successful gardening experience. To ensure high-quality seeds, choose mature Pointed gourds that are fully ripe and have a firm texture. After harvesting, clean the seeds by removing any pulp or debris and washing them thoroughly.
To improve germination rates, soak the seeds in water overnight. Once soaked, spread the seeds on a tray lined with a moist paper towel and cover them with another moist paper towel. Keep the tray in a warm and dark place for 2-3 days, ensuring the paper towels remain moist. This process will help the seeds sprout and prepare them for germination.
Germinating Pointed Gourd Seeds: Methods and Techniques
There are several effective methods and techniques to ensure successful germination. One common approach is to soak the Parwal seeds in water for 24 hours before sowing. This helps soften the seed coat and enhances germination. Another method involves scarifying the seeds by gently filing or nicking the outer layer. This allows moisture to penetrate, promoting germination.
Additionally, maintaining an optimum temperature of around 25-30 degrees Celsius and providing adequate moisture is essential. It is advisable to sow the seeds in well-drained soil and cover them lightly. Regular watering and protecting the seeds from extreme temperatures are vital for their successful germination. Generally, the time it takes for Pointed gourd seeds to germinate is 10-14 Days. How many kgs of Pointed gourd seeds need per hectare? 3.5-6 kg per hectare
Preparing the Ideal Growing Environment for Pointed Gourd Seedlings
- Start by selecting a well-draining soil that is rich in organic matter.
- Pointed gourd seedlings thrive in a pH range of 6.0 to 7.5, so ensure the soil pH is within this range.
- Provide ample sunlight, as Pointed gourd seedlings require at least 6 hours daily.
- Maintain a temperature between 25-30°C, as Pointed gourd seedlings are sensitive to extreme temperature fluctuations.
- Regularly water the seedlings, keeping the soil moist but not waterlogged.
- Protect the Pointed gourd seedlings from pests and diseases by using organic pesticides and fungicides.
In case you missed it: How and When to Fertilize Gourds: Requirements and Recommendation

Transplanting Pointed Gourd Seedlings Into the Garden
Transplanting Pointed gourd seedlings into the garden is crucial in their growth journey. This method of planting in Pointed gourd ensures the seedlings thrive in a suitable environment, resulting in healthy and productive plants.
- Before transplanting, preparing the garden bed by loosening the soil and adding organic matter for better drainage and nutrient availability is important.
- Carefully remove the Pointed gourd seedlings from their containers, being cautious not to damage the delicate roots.
- Dig holes in the garden bed, spaced appropriately for the size of the seedlings.
- Gently place the seedlings into the holes, ensuring the roots are covered with soil.
- Water your Pointed gourd plants thoroughly to settle the soil around the roots.
- Regular watering and monitoring of the plants are essential to their successful establishment in the garden.
Essential Care Practices for Healthy Pointed Gourd Plants
- For growing Parwal from seeds, First and foremost, provide your plants with adequate sunlight exposure, as they thrive in full sun.
- Additionally, ensure the soil is well-drained and rich in organic matter to promote healthy growth.
- Regular watering is crucial, especially during the growing season, but avoid overwatering as it can lead to root rot.
- Proper fertilization is also important, using a balanced fertilizer to provide necessary nutrients.
- Lastly, monitor your Pointed gourd plants for any signs of pests or diseases and take a control action.
Watering and Irrigation Techniques for Pointed Gourd Plants
A better yield is achieved by watering the plant every alternate day during the fruiting and flowering period. At the beginning of the growth cycle, watering should be done every three to five days. Once the plant bears fruits and flowers, the frequency can be increased to every alternate day. Moisture should be maintained in the soil throughout this period, but waterlogging is strictly prohibited.
Drip Irrigation: It is more efficient for water-pointing gourd plants. Minimizing water wastage, it delivers water directly to the roots. Install a drip irrigation system with emitters placed near the plants’ roots. This method provides a slow and steady water supply, promoting better absorption and reducing the risk of water stress.
Fertilizing Pointed Gourd Plants to Promote Growth and Yield
- Mix cow dung manure into the soil before planting the Pointed gourd.
- Alternatively, a balanced liquid fertilizer like 10-10-10 can be used occasionally. These fertilizers provide a mixture of essential macronutrients necessary for healthy plant development.
- When plants are transplanted, all-purpose fertilizer gives them an extra boost.
- If the plant shows signs of weakness, you can feed it again. If you side-dress the plant once or twice a year with well-rotted aged manure or compost, the plant will benefit greatly.
Managing Pests and Diseases in Pointed Gourd Cultivation
Managing pests and diseases in Pointed gourd cultivation is crucial for maintaining healthy plants and maximizing yields. Several common pests that affect Pointed gourd include aphids, fruit flies, and whiteflies. To control these pests, regular monitoring is essential. Integrated pest management techniques such as using insecticidal soaps, neem oil, and biological control agents can effectively reduce pest populations.
In case you missed it: How to Grow Spine Gourd from Seed: A Guide to Planting of Agakara/Kantola

Diseases like powdery mildew and bacterial wilt can also impact Pointed gourd plants. Proper sanitation practices, crop rotation, and resistant cultivars can help prevent disease outbreaks. Timely intervention and a proactive approach are key to successfully managing pests and diseases in Pointed gourd cultivation.
Harvesting Pointed Gourds: Timing, Techniques, and Storage
How long does it take for a Pointed gourd to grow? The answer is here. It takes 3-4 months for Pointed gourds to mature after planting. It usually takes 120 to 140 days for the plant to start producing fruit after transplanting, which usually occurs in February and lasts until September. The vegetable can be harvested 15-18 days after pollination and before it reaches full maturity. Harvesting should be done weekly for best results. Generally, the yield of Pointed Gourd ranges between 50 to 60 kg per acre.
You can harvest Pointed gourds by cutting them from the vine with sharp knives or garden shears, leaving a short stem attached. Please take care not to damage nearby vines or fruit. Ensure the gourds are clean by gently brushing off any dirt or debris. Do not handle them roughly to prevent bruises. Place them in a cool, dry, well-ventilated area to avoid moisture buildup and rot. To maintain humidity levels, you can also store them in the refrigerator, preferably in a perforated plastic bag.
Conclusion
Growing Pointed gourd from seed at home can be a fulfilling and rewarding experience. With the steps presented in this article, you can successfully germinate parwal seeds, plant Pointed gourd plants, and harvest a bountiful harvest of tasty and fresh parwals.
- Feed Your Flock for Less: Top 10 Tips to Save on Chicken Feed
- Ultimate Guide to Ossabaw Island Hog: Breeding, Raising, Diet, and Care
- Hatching Answers: The Top 10 Reasons Your Chickens Aren’t Laying Eggs
- Eggs and Economics: Breaking Down the Cost of Raising Backyard Chickens
- Defend Your Greens: Proven Methods to Keep Iguanas Out of Your Garden
- Ultimate Guide to Cinnamon Queen Chicken: A Comprehensive Guide for Beginners
- Ultimate Guide to California Tan Chicken: Breeding, Raising, Diet, Egg-Production and Care
- Ultimate Guide to Marsh Daisy Chicken: Breeding, Raising, Diet, and Care
- 10 Types of Chicken Farming Businesses You Can Start for Profits